
How to Connect LaunchBay to ChatGPT
This guide walks you through connecting your LaunchBay account to ChatGPT. Once connected, ChatGPT can find tasks and projects, create work, send client reminders, update statuses, and more — directly from your chat.
Not using ChatGPT? See How to connect LaunchBay to Claude or visit the LaunchBay MCP Connector Overview for other supported tools.
Before You Start
- You'll need a paid ChatGPT plan (Plus, Pro, Team, or Enterprise). Free accounts do not support custom MCP connections.
- If you're on a Team or Business plan, a workspace admin must complete Steps 1–5 to set up the connector before team members can connect their individual accounts.
- If an admin has completed Steps 1-5, team members can follow Step 4, 8-9 to connect
Your MCP server URL: https://app.launchbay.com/mcp/launchbay
Full Setup Instructions
Step 1: Confirm your workspace
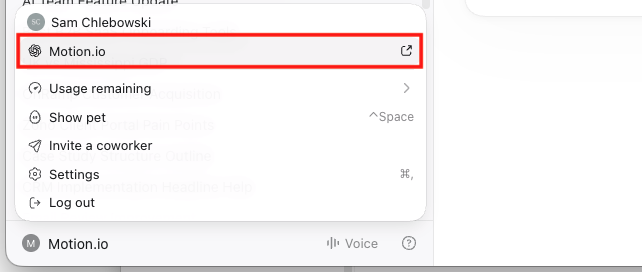
Click your profile in the bottom left corner of ChatGPT and confirm you are in the correct team workspace before proceeding. Your workspace name will appear at the top of the dropdown.
Step 2: Open the Apps settings
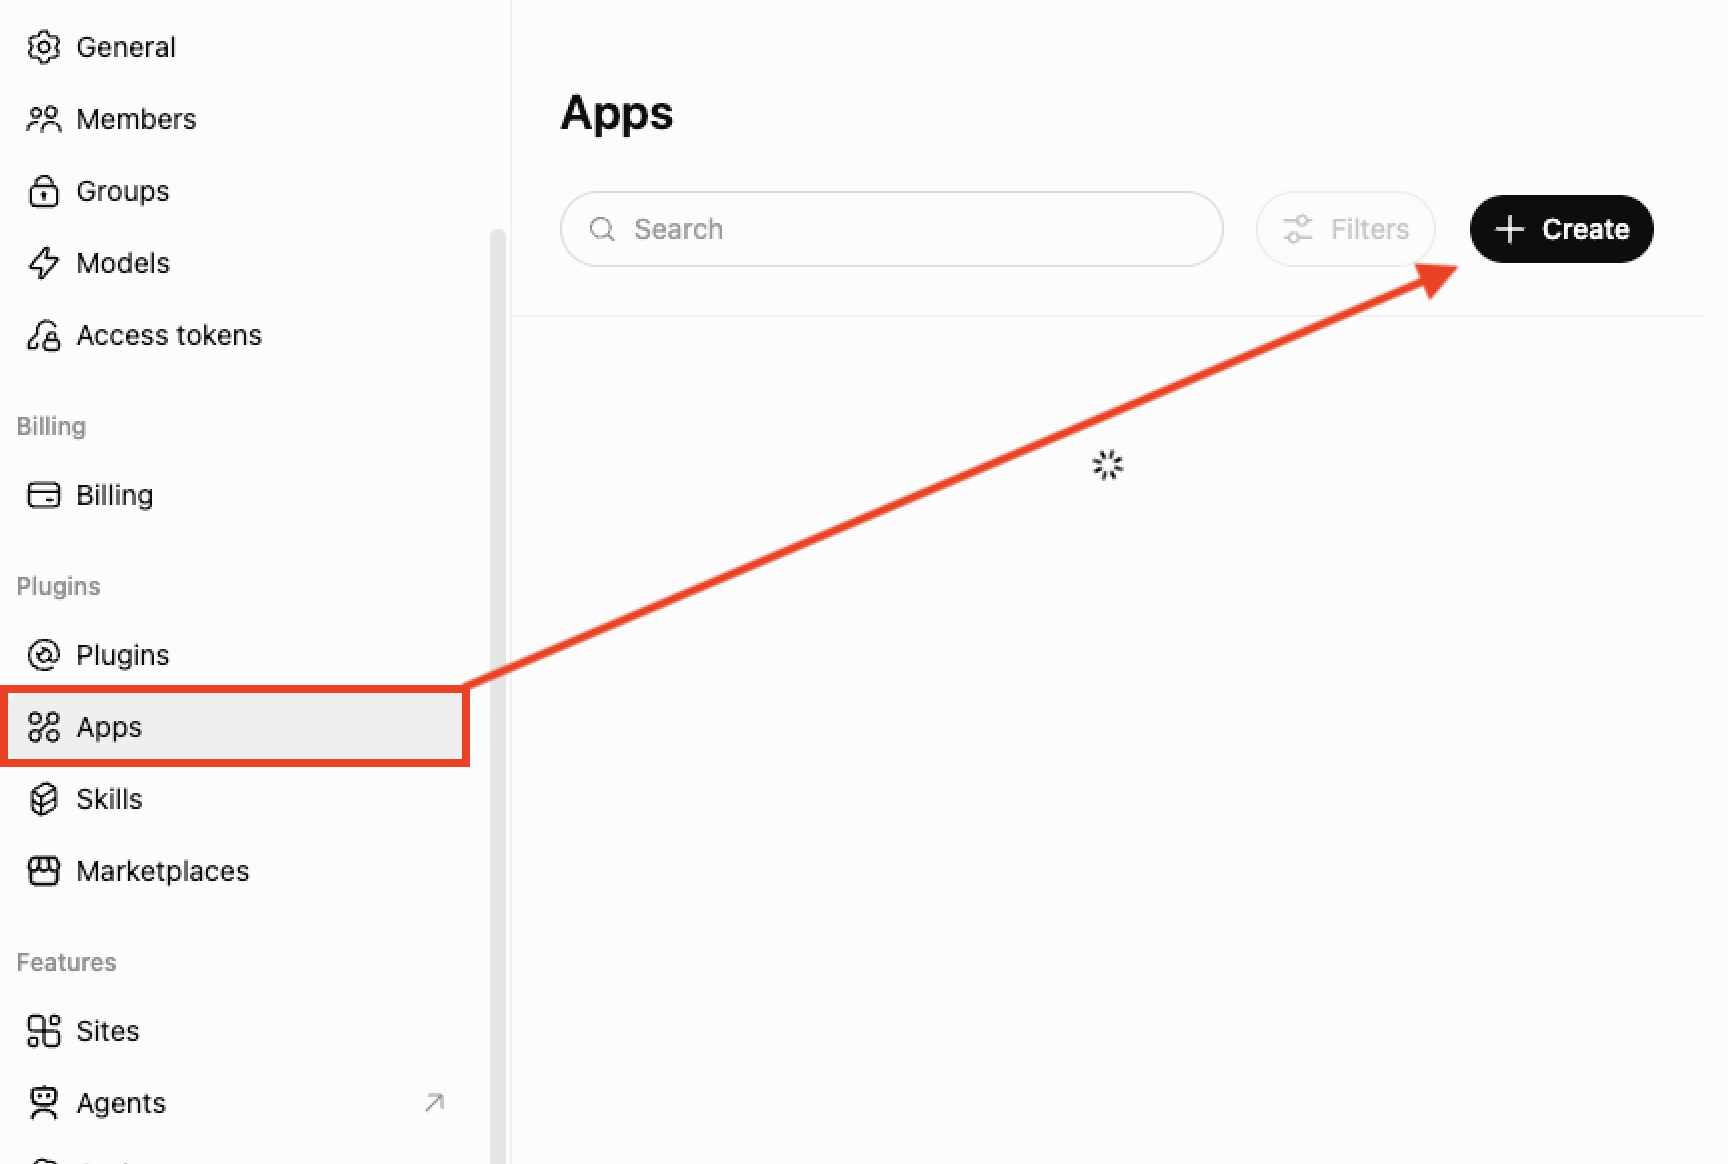
In your ChatGPT settings, navigate to Plugins → Apps and click + Create in the top right corner.
Step 3: Configure the LaunchBay app
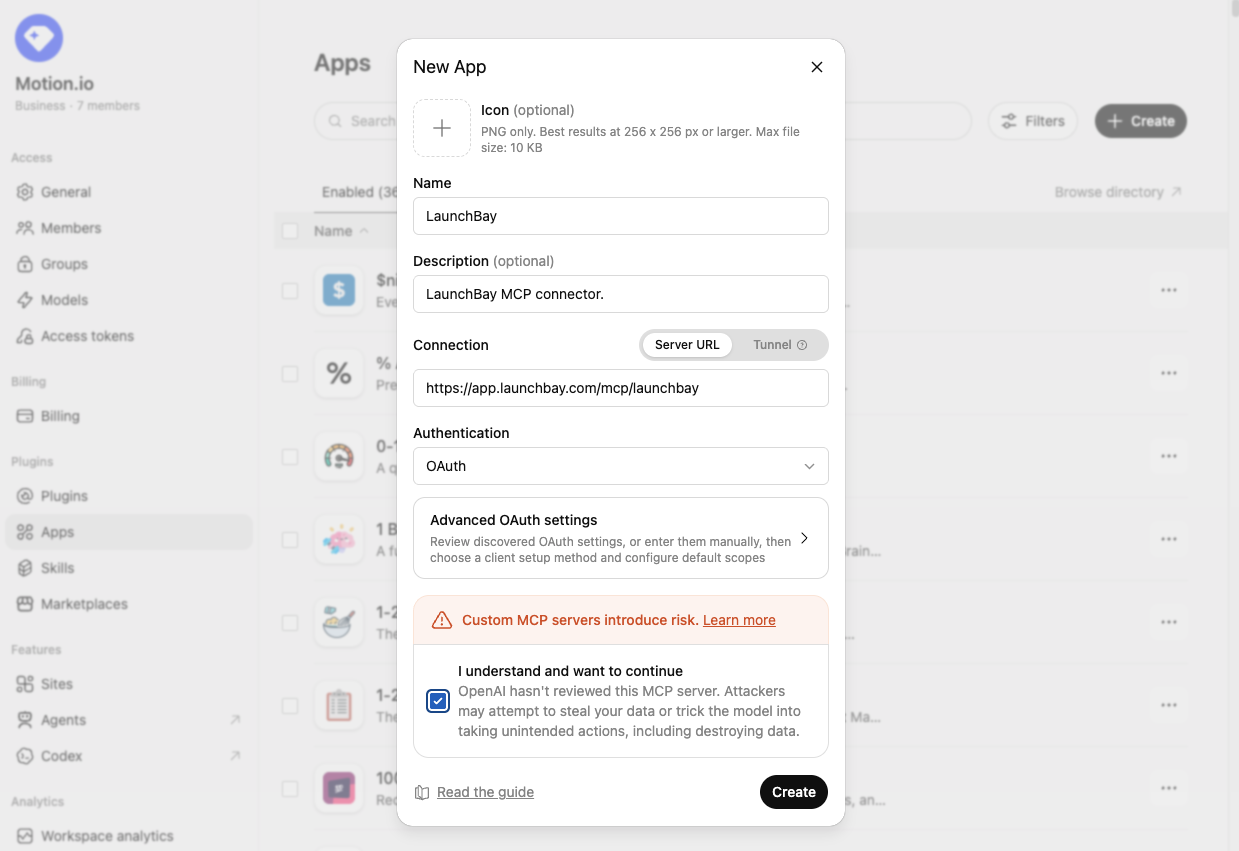
In the "New App" modal, enter the following:
- Name: LaunchBay
- Description (optional): LaunchBay MCP connector.
- Connection: Select Server URL, then enter
https://app.launchbay.com/mcp/launchbay - Authentication: Select OAuth
Check the acknowledgment box confirming you understand that custom MCP servers introduce risk, then click Create.
Step 4: Find LaunchBay in the Plugins tab
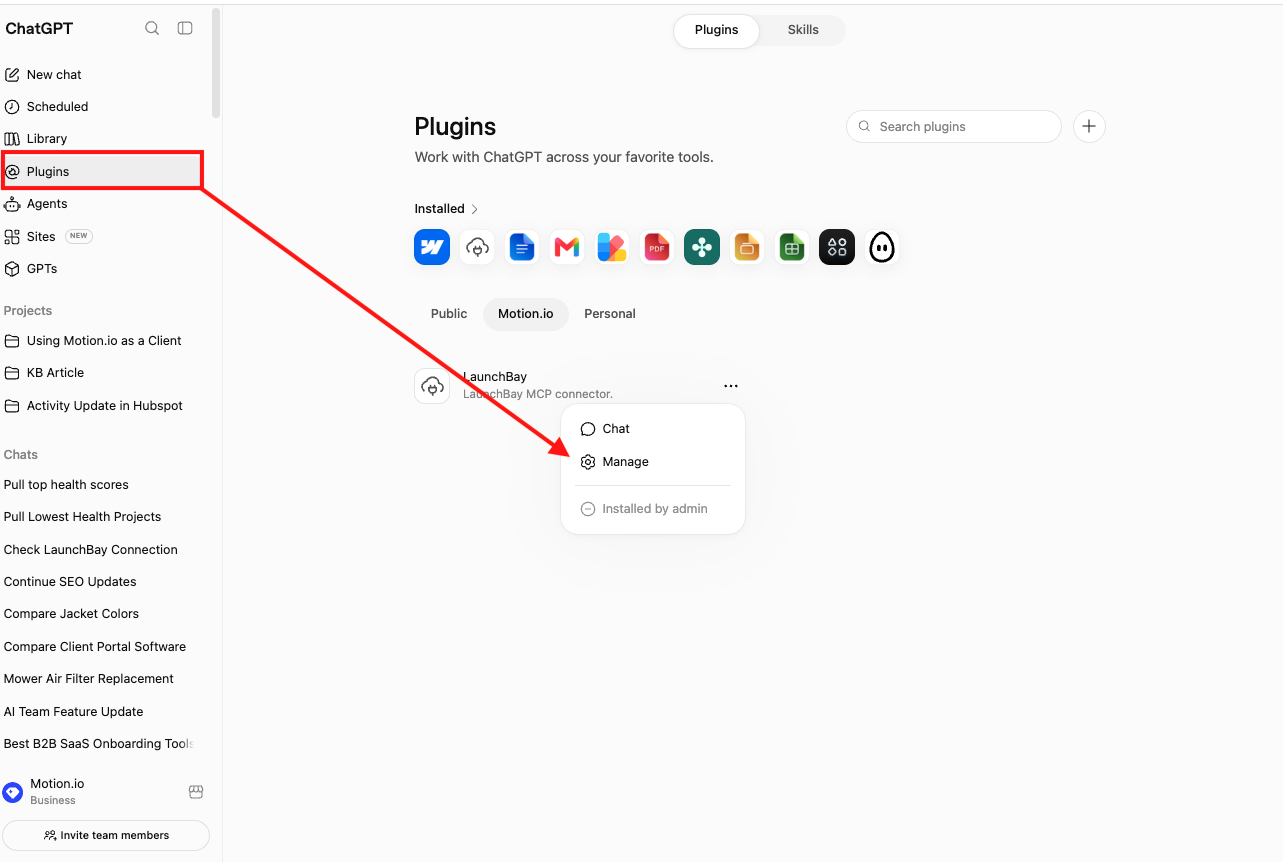
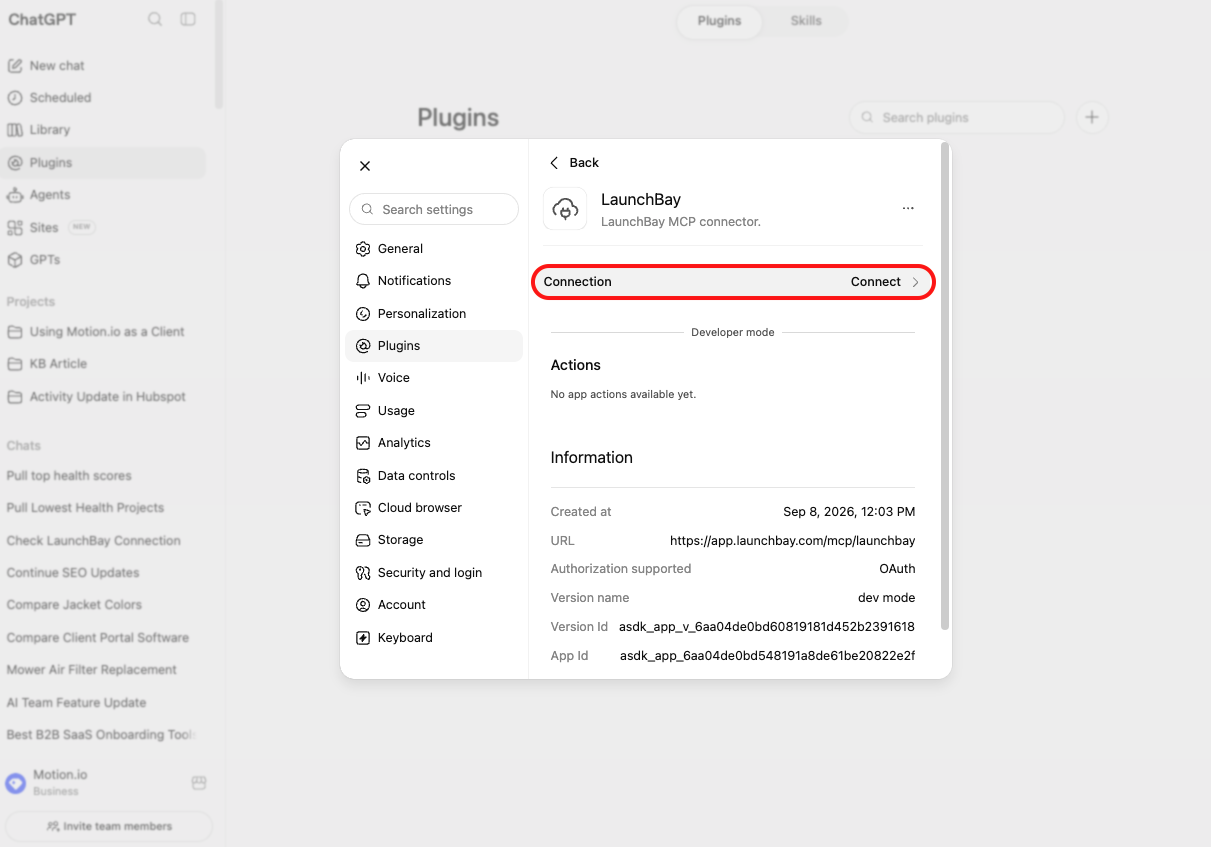
Once the app is created, navigate to Plugins in the left sidebar of ChatGPT. You'll see LaunchBay listed under your workspace's plugin tab. Click the three dots next to LaunchBay and select Manage.
Step 5: Review and connect the app
On the LaunchBay plugin detail screen, click Review App in the top right corner. You'll also see a Connect button next to the Connection field — you'll use this after completing the review steps.
Step 6: Acknowledge the data access risk
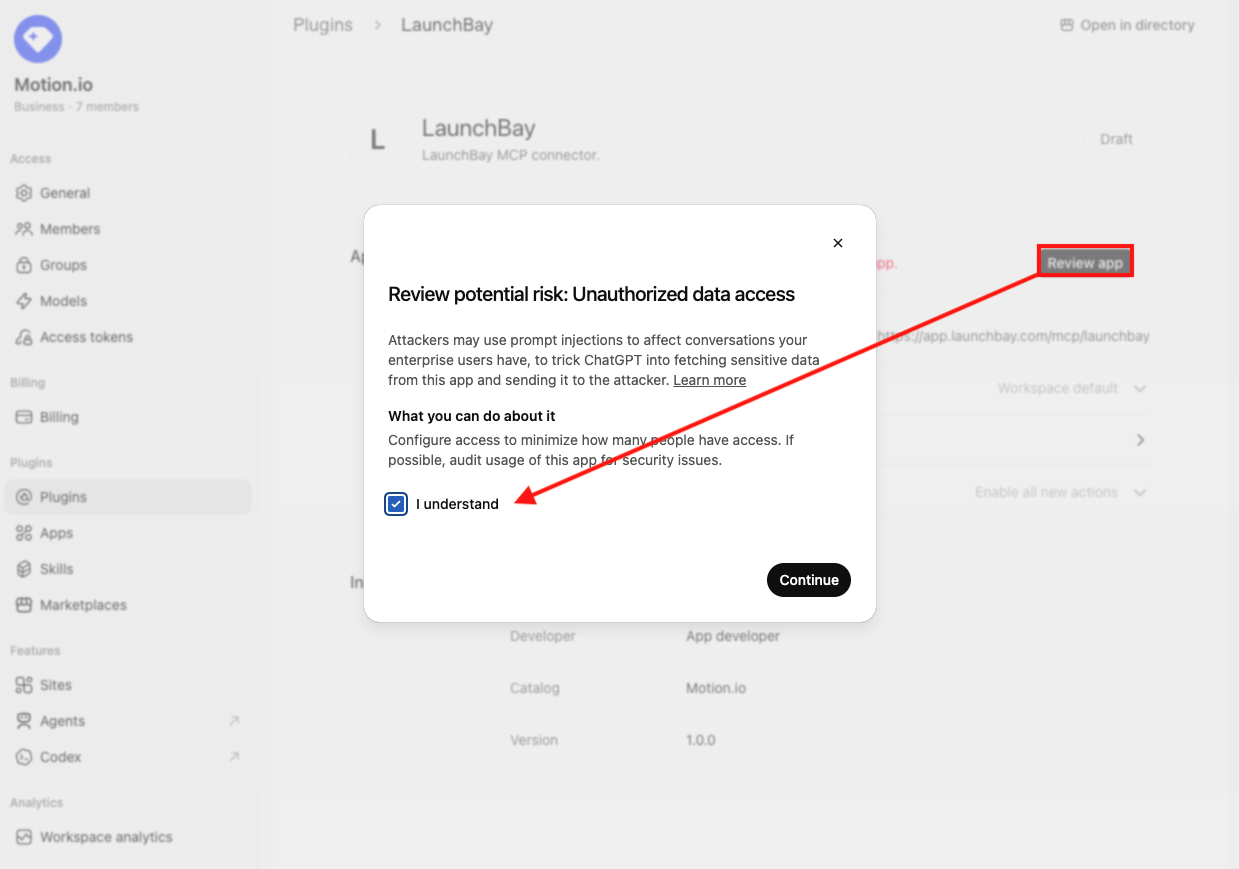
ChatGPT will display a security prompt about unauthorized data access. Check the "I understand" box and click Continue.
Step 7: Acknowledge the app review risk
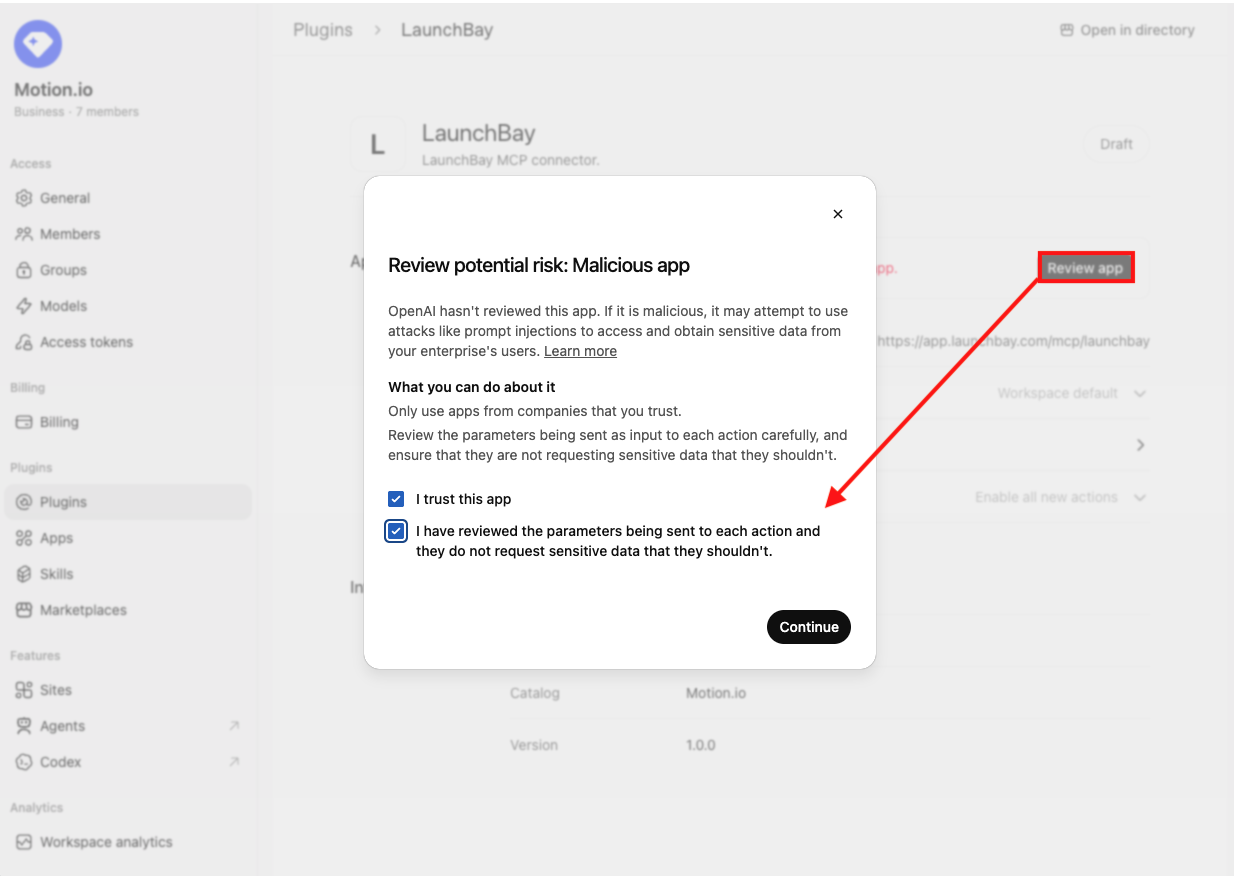
A second security prompt will appear noting that OpenAI hasn't reviewed this app. Check both acknowledgment boxes — "I trust this app" and "I have reviewed the parameters being sent to each action" — and click Continue.
Step 8: Connect to LaunchBay
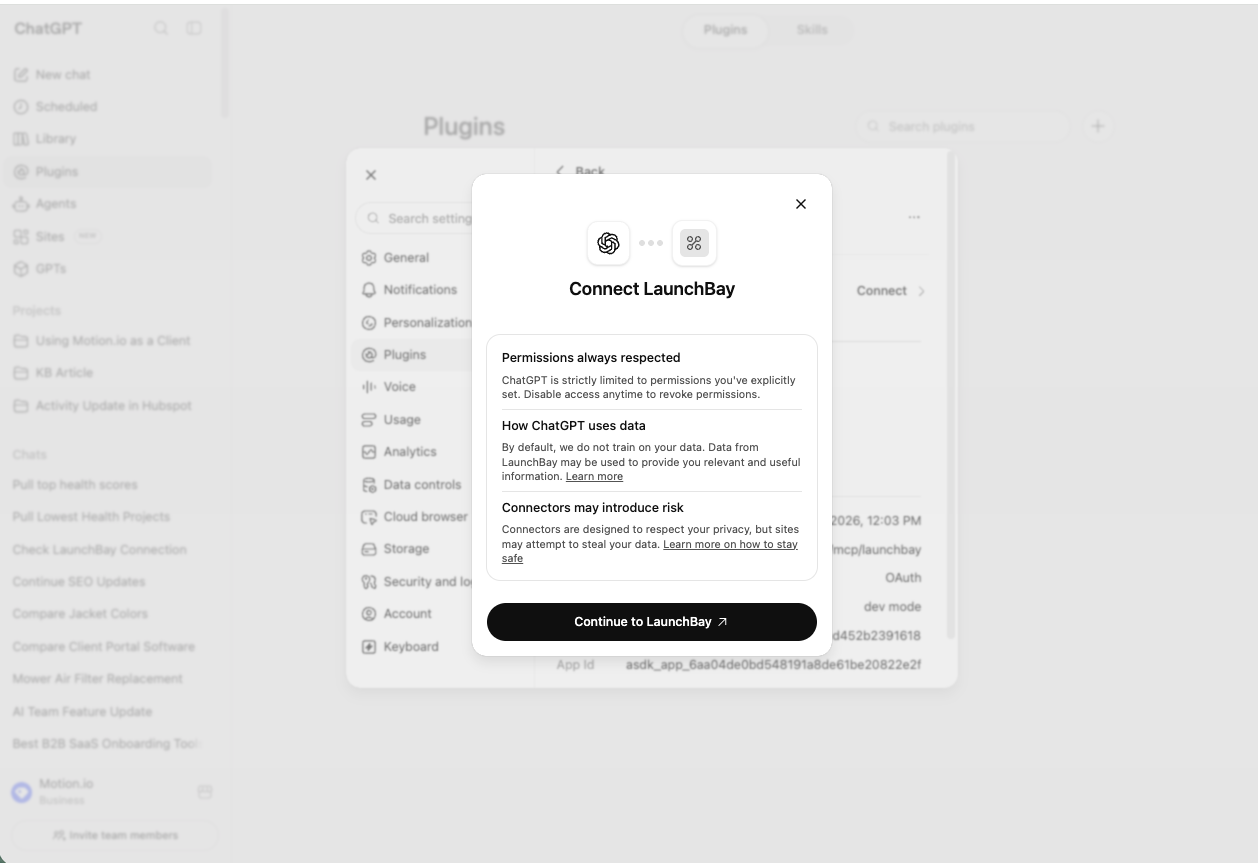
A "Connect LaunchBay" modal will appear with information about how ChatGPT uses your data and permissions. Review the details and click Continue to LaunchBay to proceed to authorization.
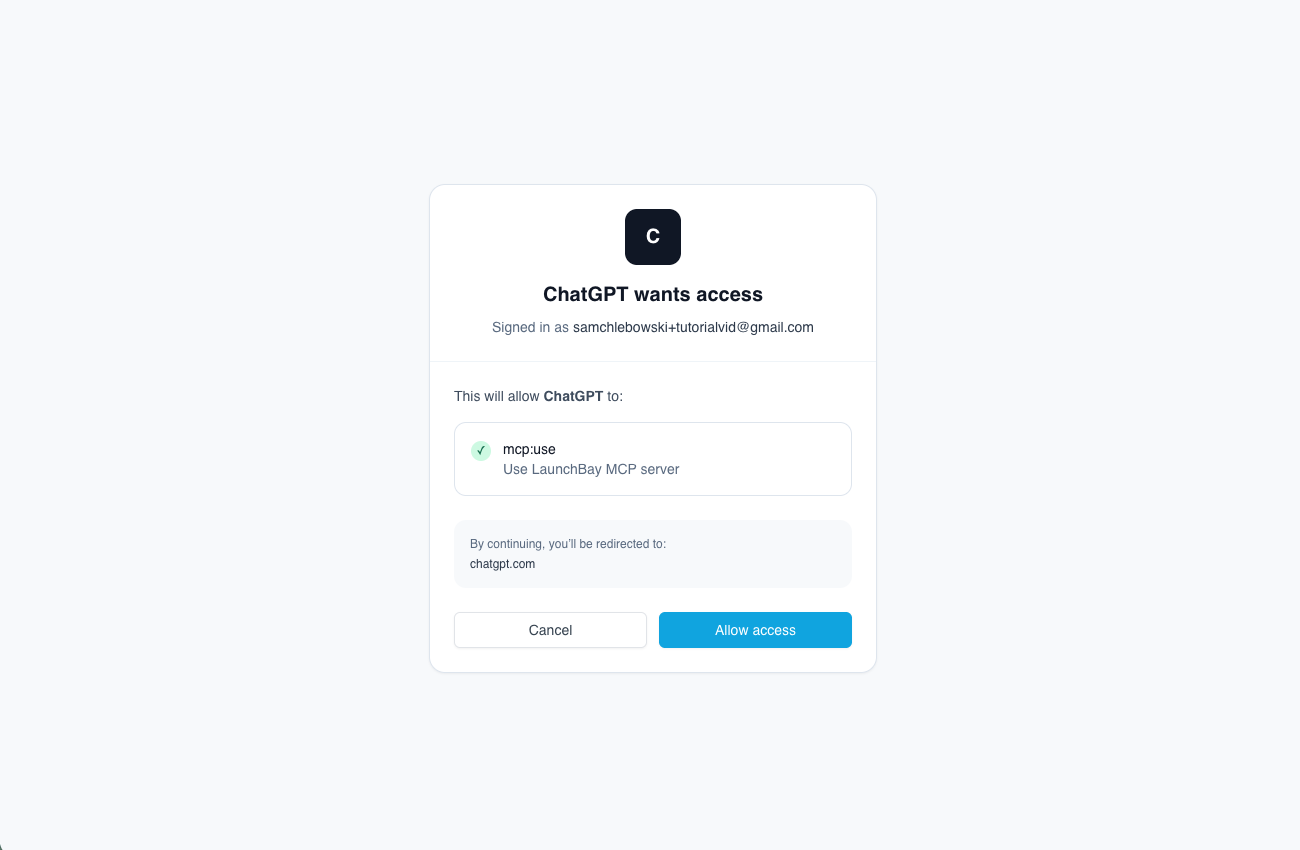
Step 9: Authorize LaunchBay access
You'll be taken to a LaunchBay authorization screen confirming that ChatGPT is requesting access to use the LaunchBay MCP server. Click Allow access to complete the connection.
Once authorized, ChatGPT will have access to your LaunchBay account. Team members on a Business or Team plan can connect their own accounts by following Steps 4 and 8–9 from their individual ChatGPT accounts.
Need Help?
Start a support chat from inside your LaunchBay account or email us at hello@launchbay.com.