
How to Connect LaunchBay to Claude
This guide walks you through connecting your LaunchBay account to Claude. Once connected, Claude can find tasks and projects, create work, send client reminders, update statuses, and more — directly from your chat.
Not using Claude? See How to connect LaunchBay to ChatGPT or visit the LaunchBay MCP Connector Overview for other supported tools.
Before You Start
- You'll need a paid Claude plan. Free accounts do not support custom MCP connectors.
- Confirm with your team admin that your account has permission to add custom connectors.
Your MCP server URL: https://app.launchbay.com/mcp/launchbay
Full Setup Instructions
Below we'll walk through each step to get LaunchBay connected to your Claude account.
Step 1: Open the Connectors panel
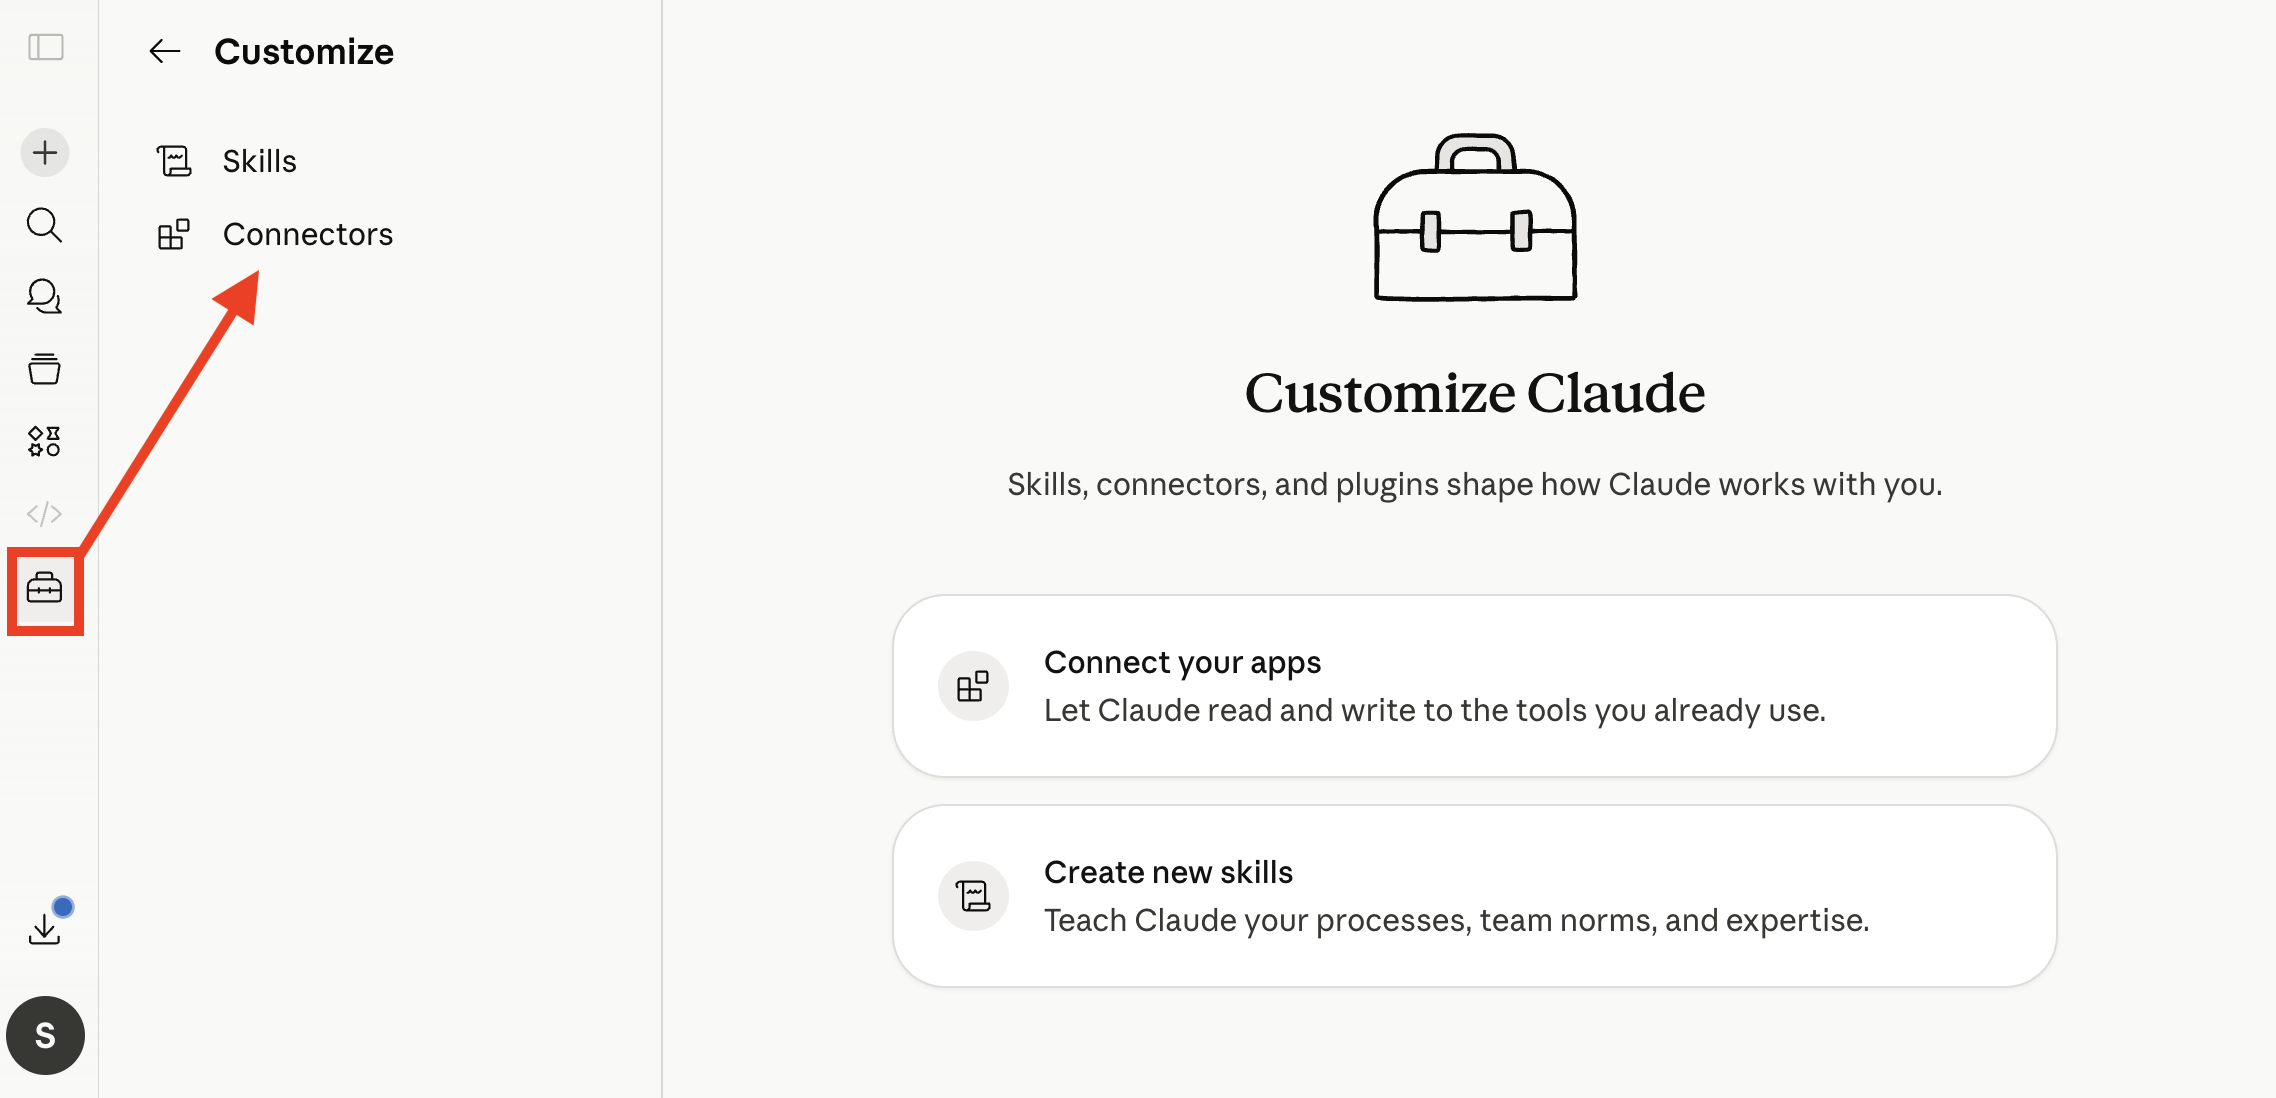
Open Claude and click the settings or customize icon in the sidebar. Select Connectors from the left menu.
Step 2: Add a custom connector
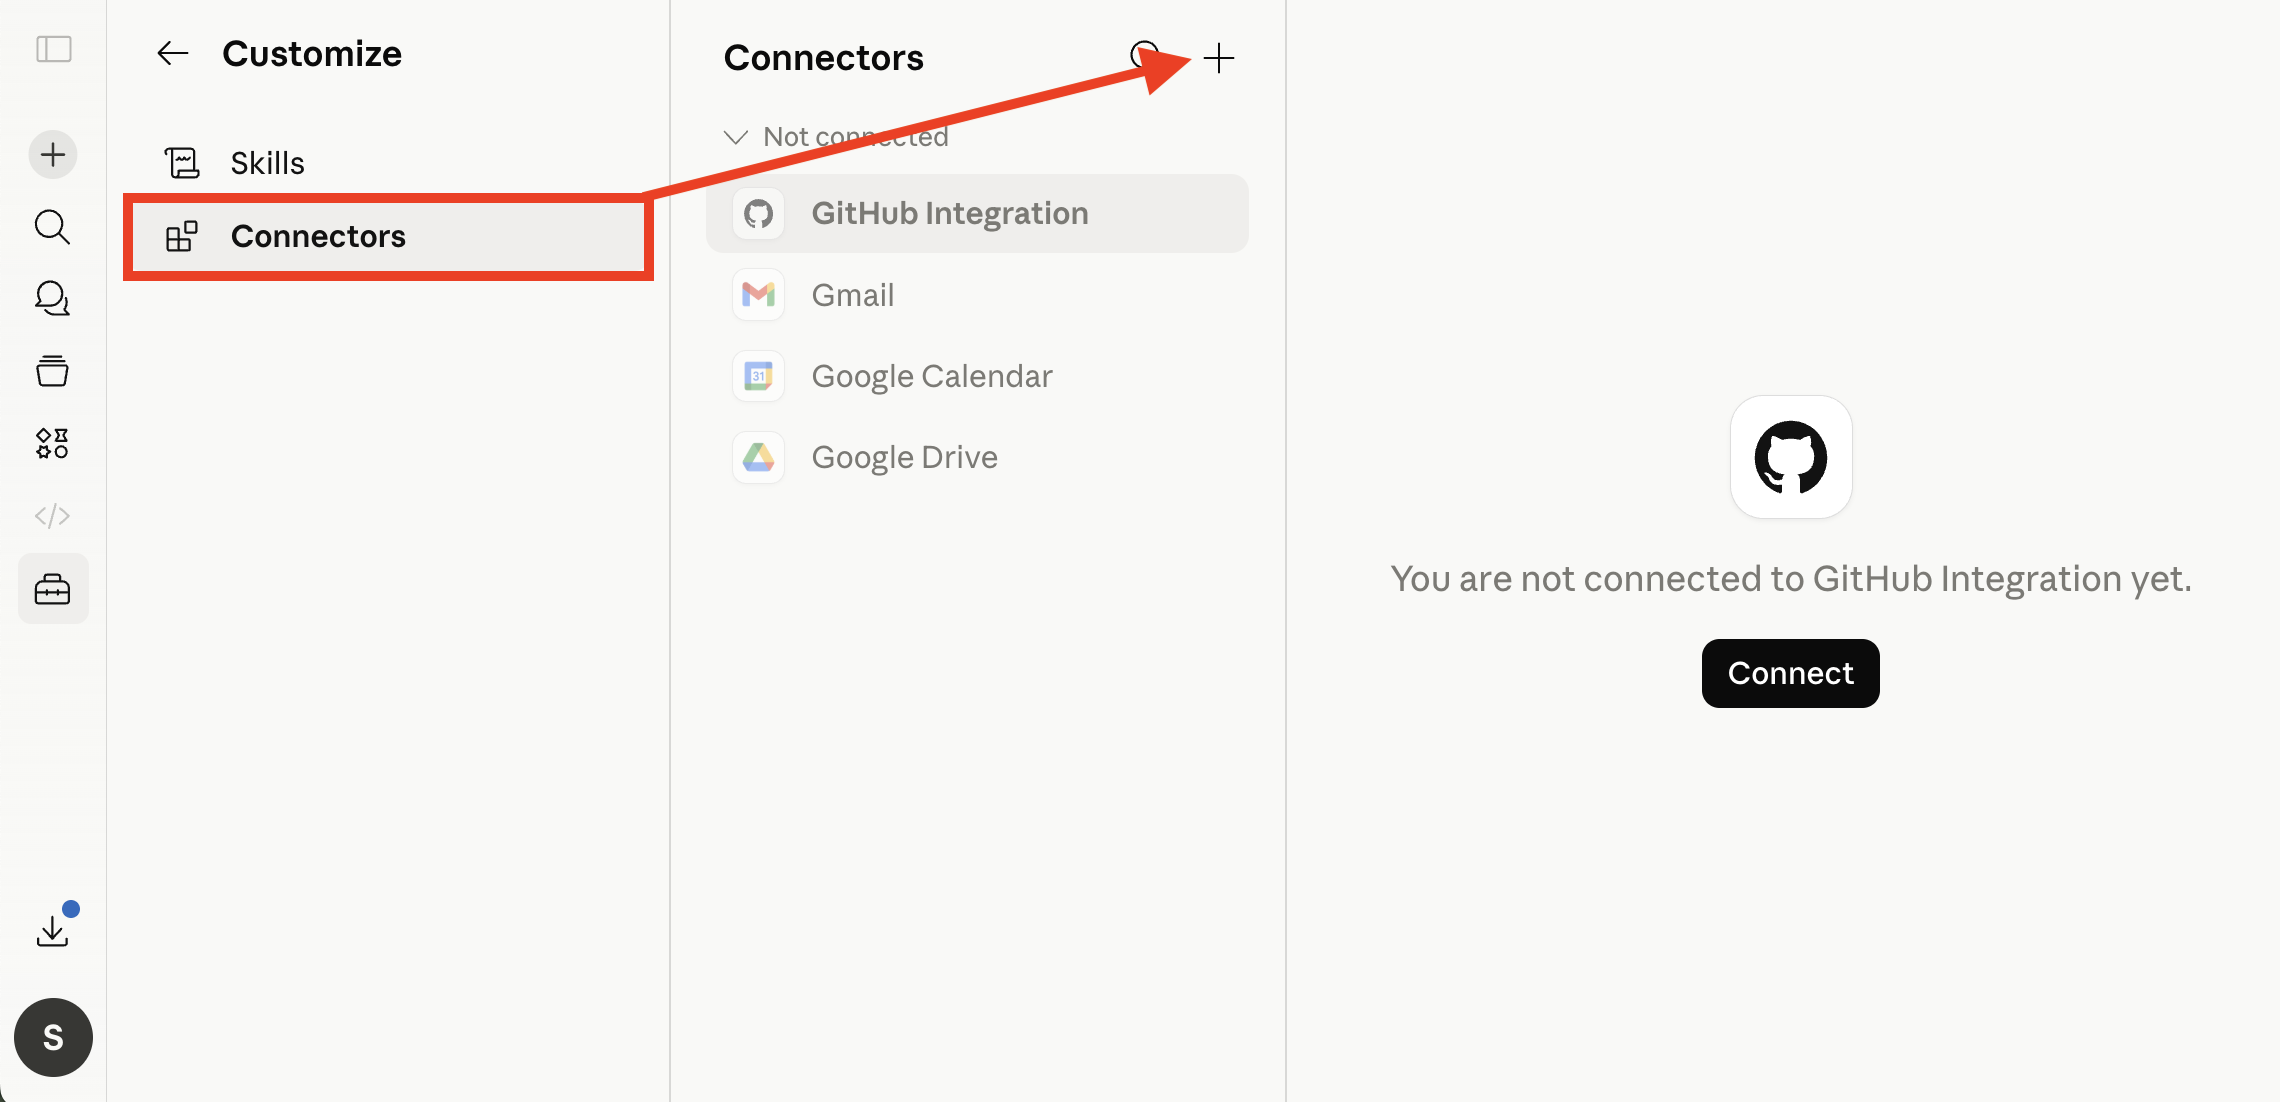
Click the + icon at the top of the Connectors panel to open the "Add custom connector" modal.
Step 3: Enter the LaunchBay connection details
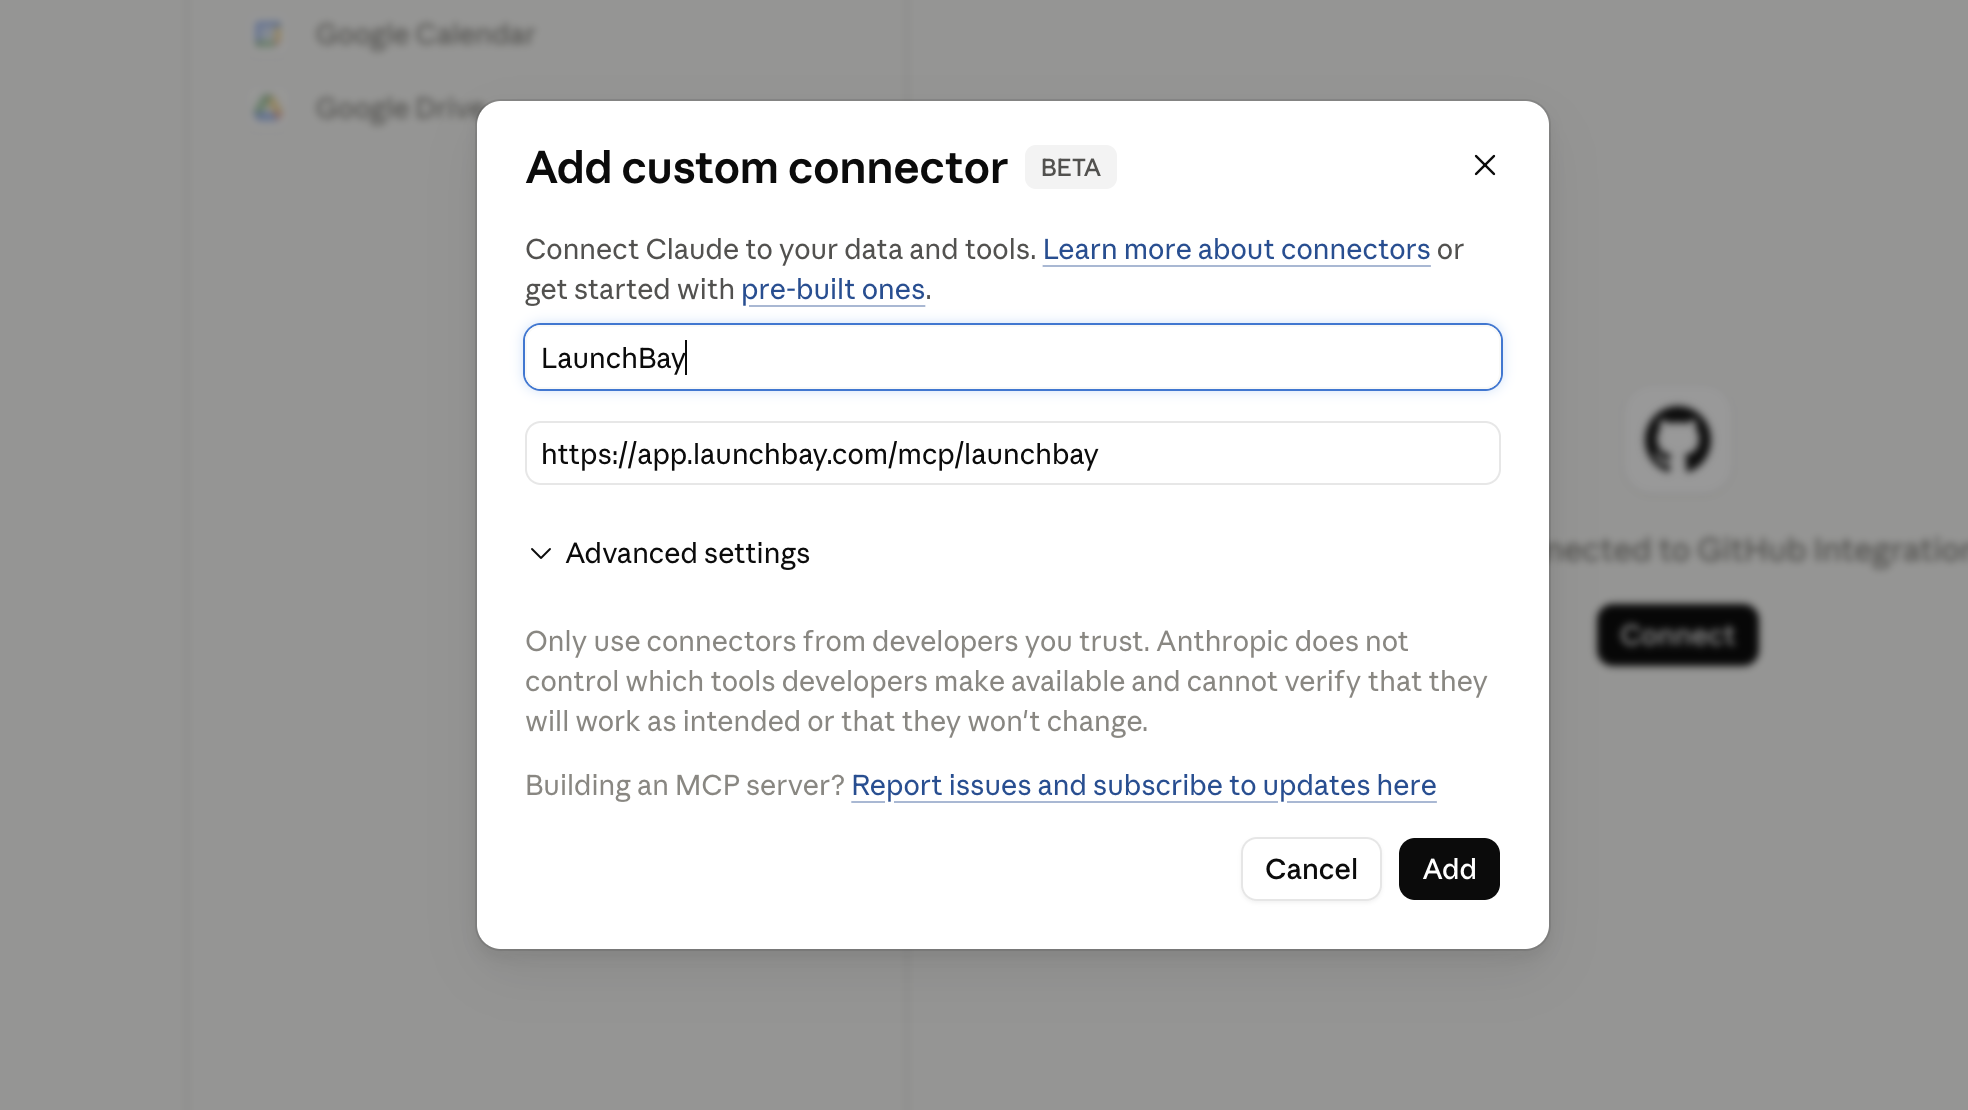
Enter the following:
- Name: LaunchBay
- URL:
https://app.launchbay.com/mcp/launchbay
Then click Add.
Step 4: Authorize with your LaunchBay account
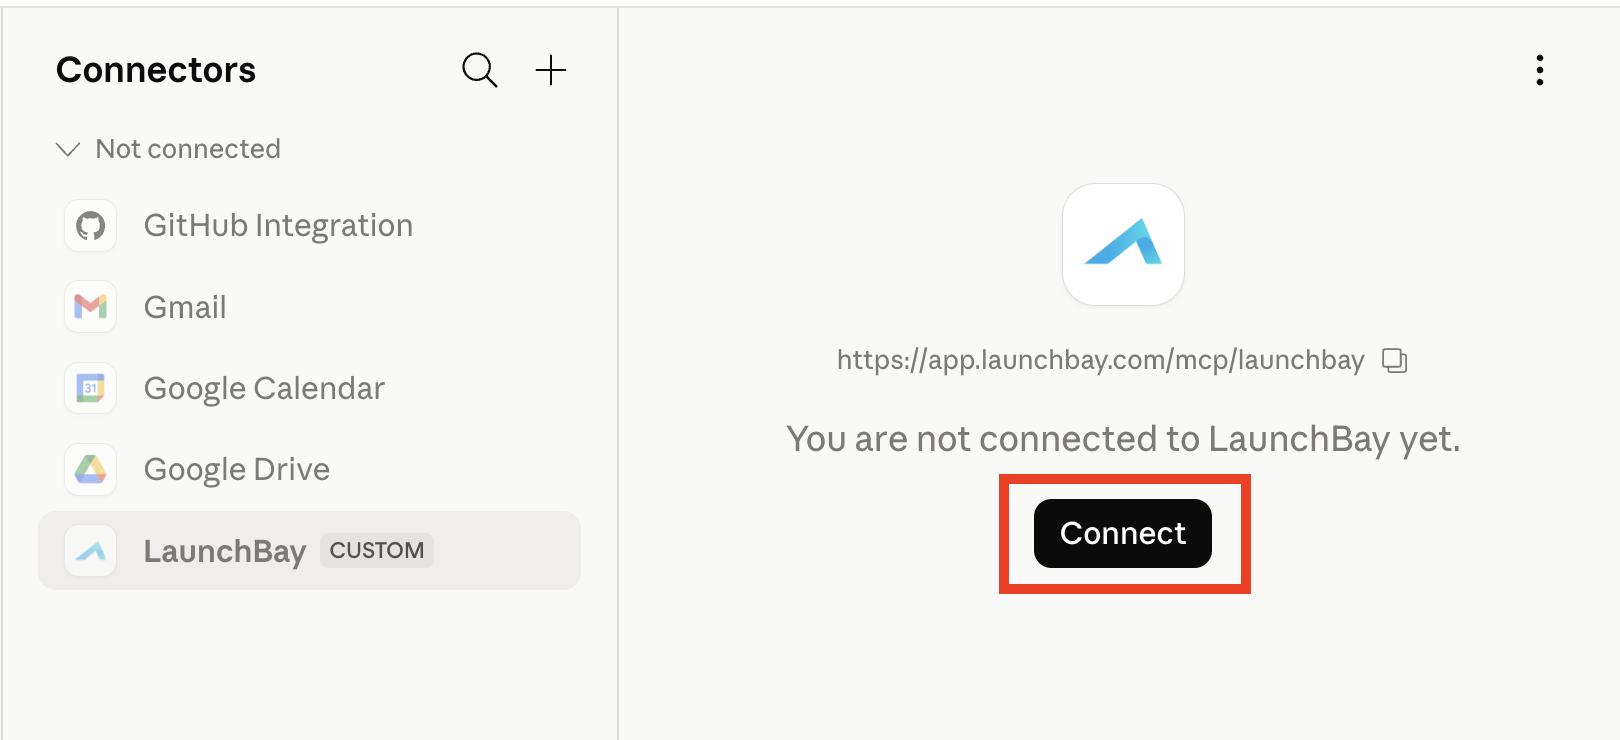
You'll be redirected through an OAuth flow. Log in with your LaunchBay credentials to authorize the connection. Once authorized, LaunchBay will appear in your Connectors list. Click Connect to activate it. You're ready to go.
Need help?
Start a support chat from inside your LaunchBay account or email us at hello@launchbay.com.