
Automated Reminders for Portal Tasks
In LaunchBay, you can set up automated reminders for tasks you assign to clients in just a few clicks. This allows you and your team to focus on high-value work while LaunchBay takes care of the tedious follow-ups about tasks clients must complete.
This article will detail how automated reminders for portal tasks work and how to set them up.
How Automated Reminders Work
When you toggle on "Reminders" for a task, LaunchBay will automatically remind all clients assigned to the task to complete it. Reminder emails are sent automatically on a predefined schedule based on the task's due date.
To streamline the setup process for automated reminders, LaunchBay uses the text you enter in the "Details" section of the task for the email's body content, along with one of the corresponding subject lines in the schedule below.

📢 Note: While the subject line and predefined schedule (shown above) for automated task reminders cannot be modified, you can customize the welcome email clients receive when you invite them to a portal. Click here to learn more.
How to Use Automated Reminders
Step 1: Create a Portal Task
After selecting a project from your dashboard, click "Create Task."

Step 2: Set a Due Date for the Task
After entering your information for the task, set a due date by clicking "Due Date" on the right side of the task composer.

In addition to setting a fixed due date, you can also set a due date as a number of days after the task is activated. Enter a number in the "Days after activation" field and LaunchBay will automatically calculate the due date when the task goes live. This works in both active projects and templates.
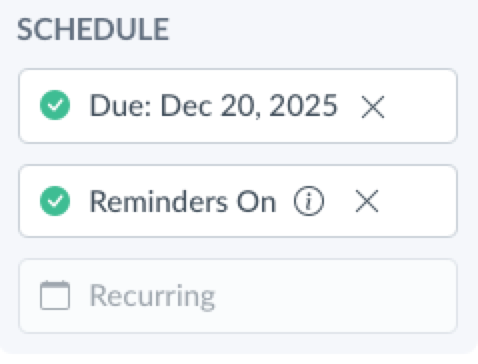
Step 3: Toggle on "Reminders"
After setting a due date, Reminders will automatically be enabled. If you'd like to disable them, just click the "X" icon.
👋 Tip: In the "Tasks" tab of your LaunchBay projects, any tasks set up to send automated reminders will display a clock icon next to the due date.